Articles
August 2017 — Rosette transplant for 1965 Martin 000-28 Re-top
Recently a 1965 Martin 000-28 came into my shop for a re-top due to a significant history of bad top repairs that had rendered the original top unfit for further service. I had a 60s joined but un-rosetted Sitka top from the Martin factory that I had bought from Mike Longworth over 20 years ago, and decided to use that top for the guitar. So naturally I had to come up with a rosette for the top. I was planning to do this re-top without disturbing the top binding (as I've shown in another Guitarmaker article previously), and wanted the rosette material to match up with the original binding as closely as possible. As anyone who has ever tried to match old plastic binding to new can attest, this can be a difficult task. All black is not equally 'black', and the same can be said for white material. But more importantly, the gauging of the rosette lines in 60s Martin guitars is critical to the overall look, and I've not found anything available in the current market that perfectly matches the gauges of the finest lines in the 60s rosettes perfectly. So rather than try to create a rosette that isn't quite correct from modern materials, in this article I'll demonstrate how I transplanted the original 000-28 rosette from the original guitar top into the new top.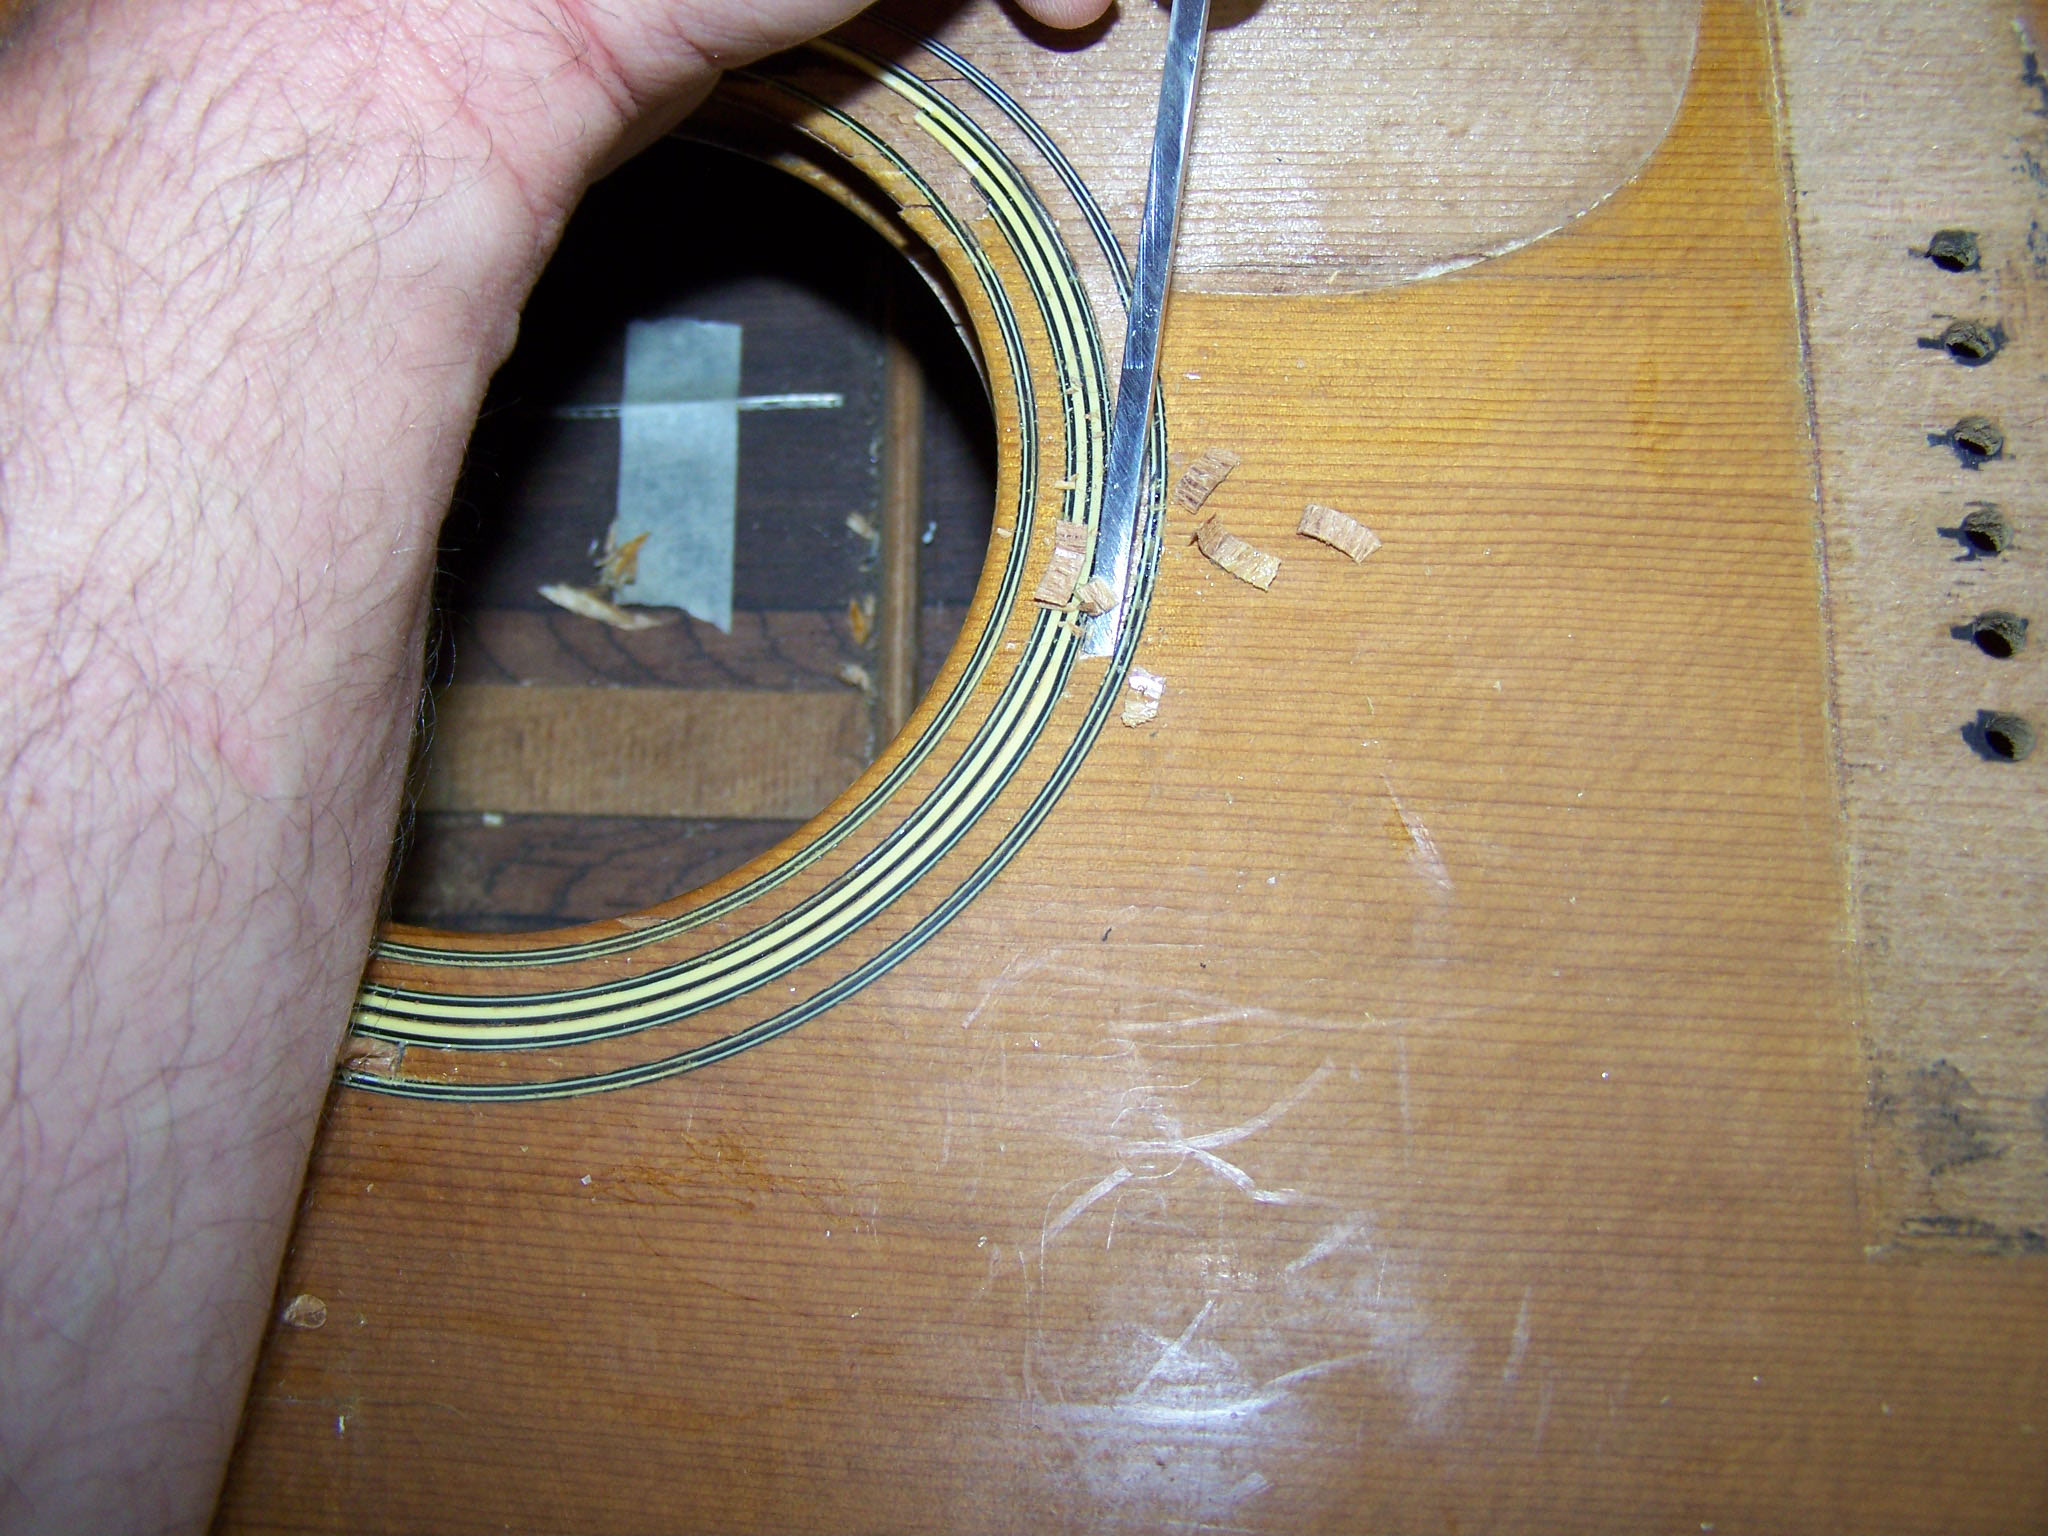
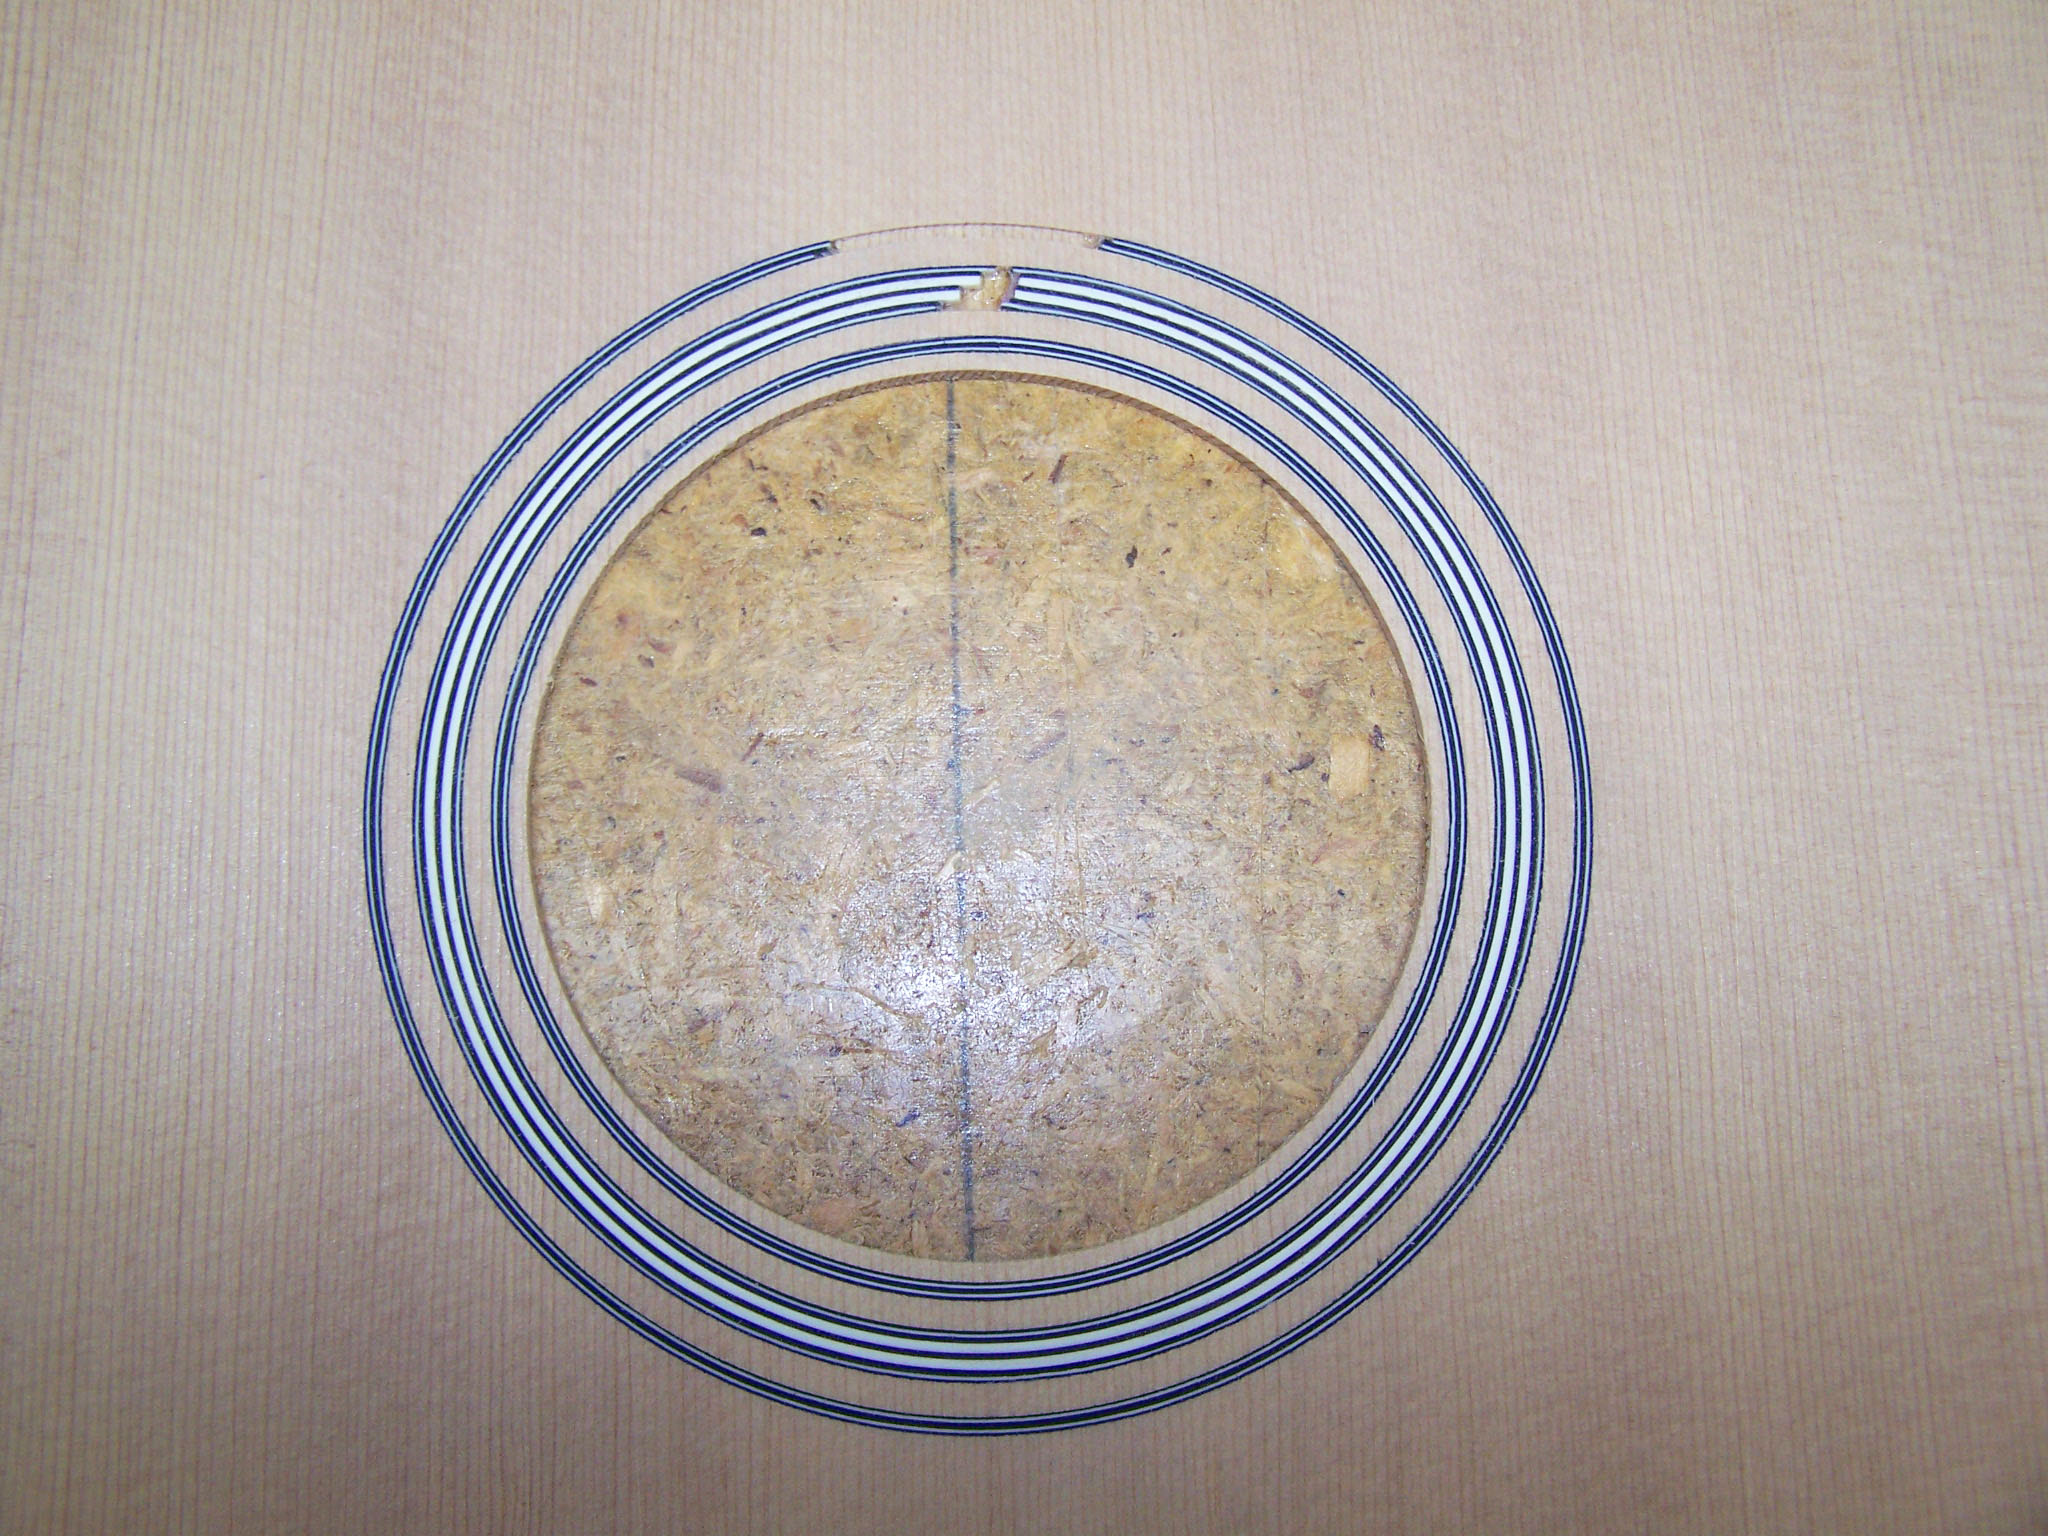
The strip of spruce between the outer most ring of rosette purfling and the center ring is just about 1/8” in width. I start by working with a sharp 1/8” 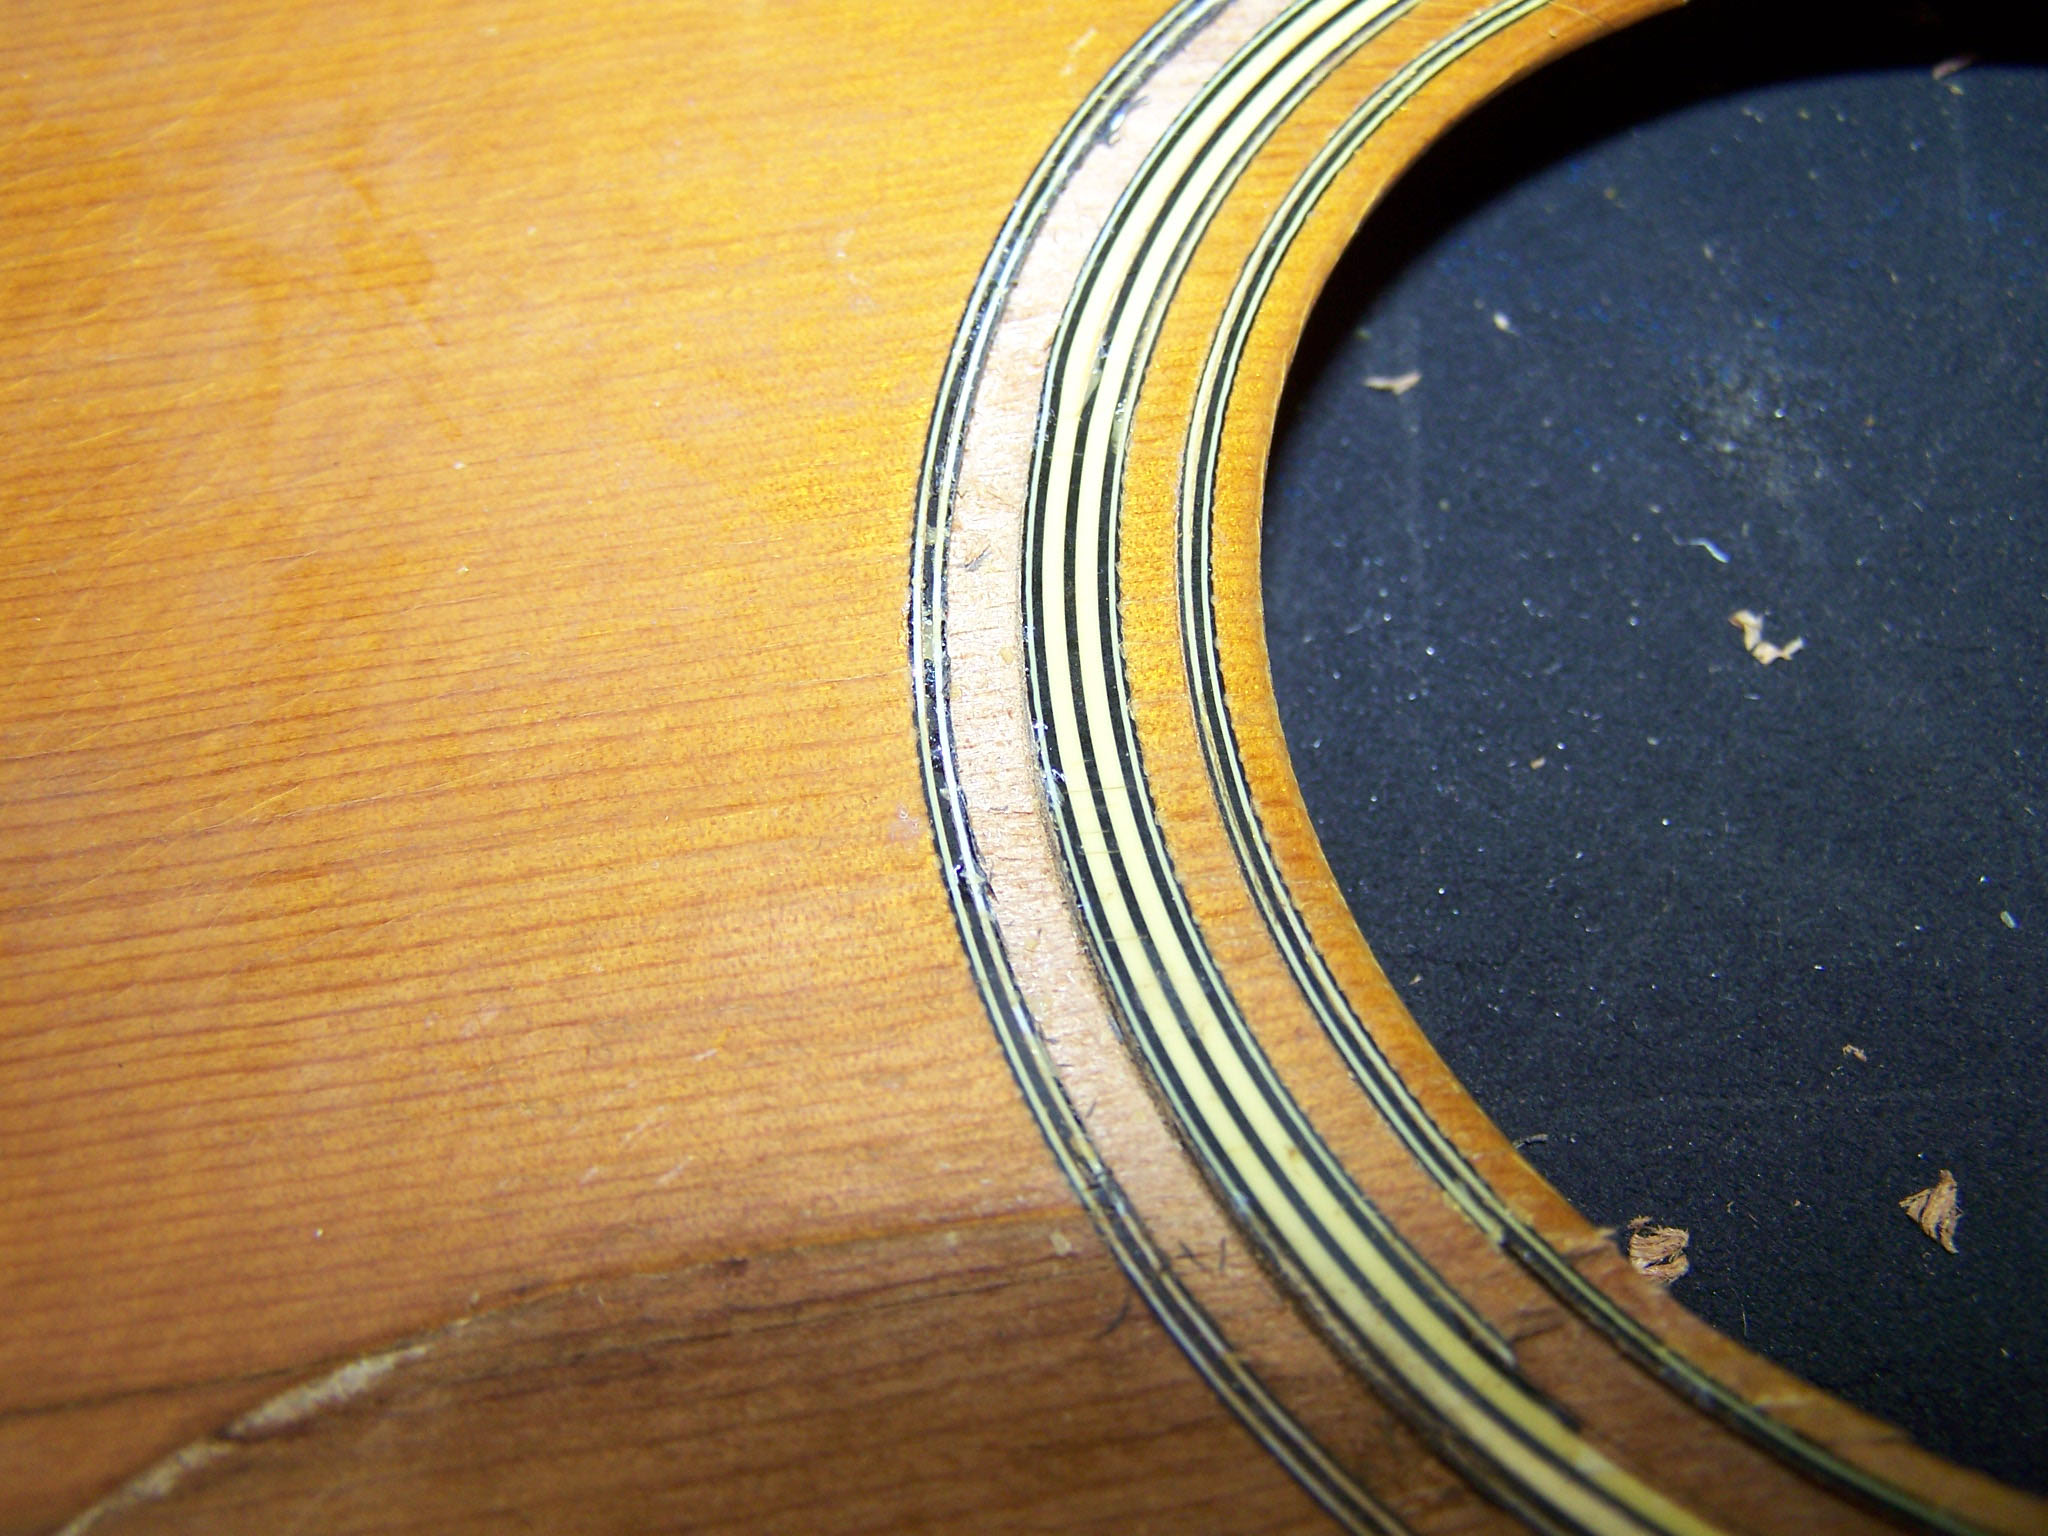 chisel to excise the spruce between the outer ring and the center ring. It is important that your chisel be sharp. I'll cut just as deep as the depth of the purfling lines, removing all of the spruce between the lines all the way around the rosette. When finished there will be a clean channel around the entire rosette between the outer and center rings.
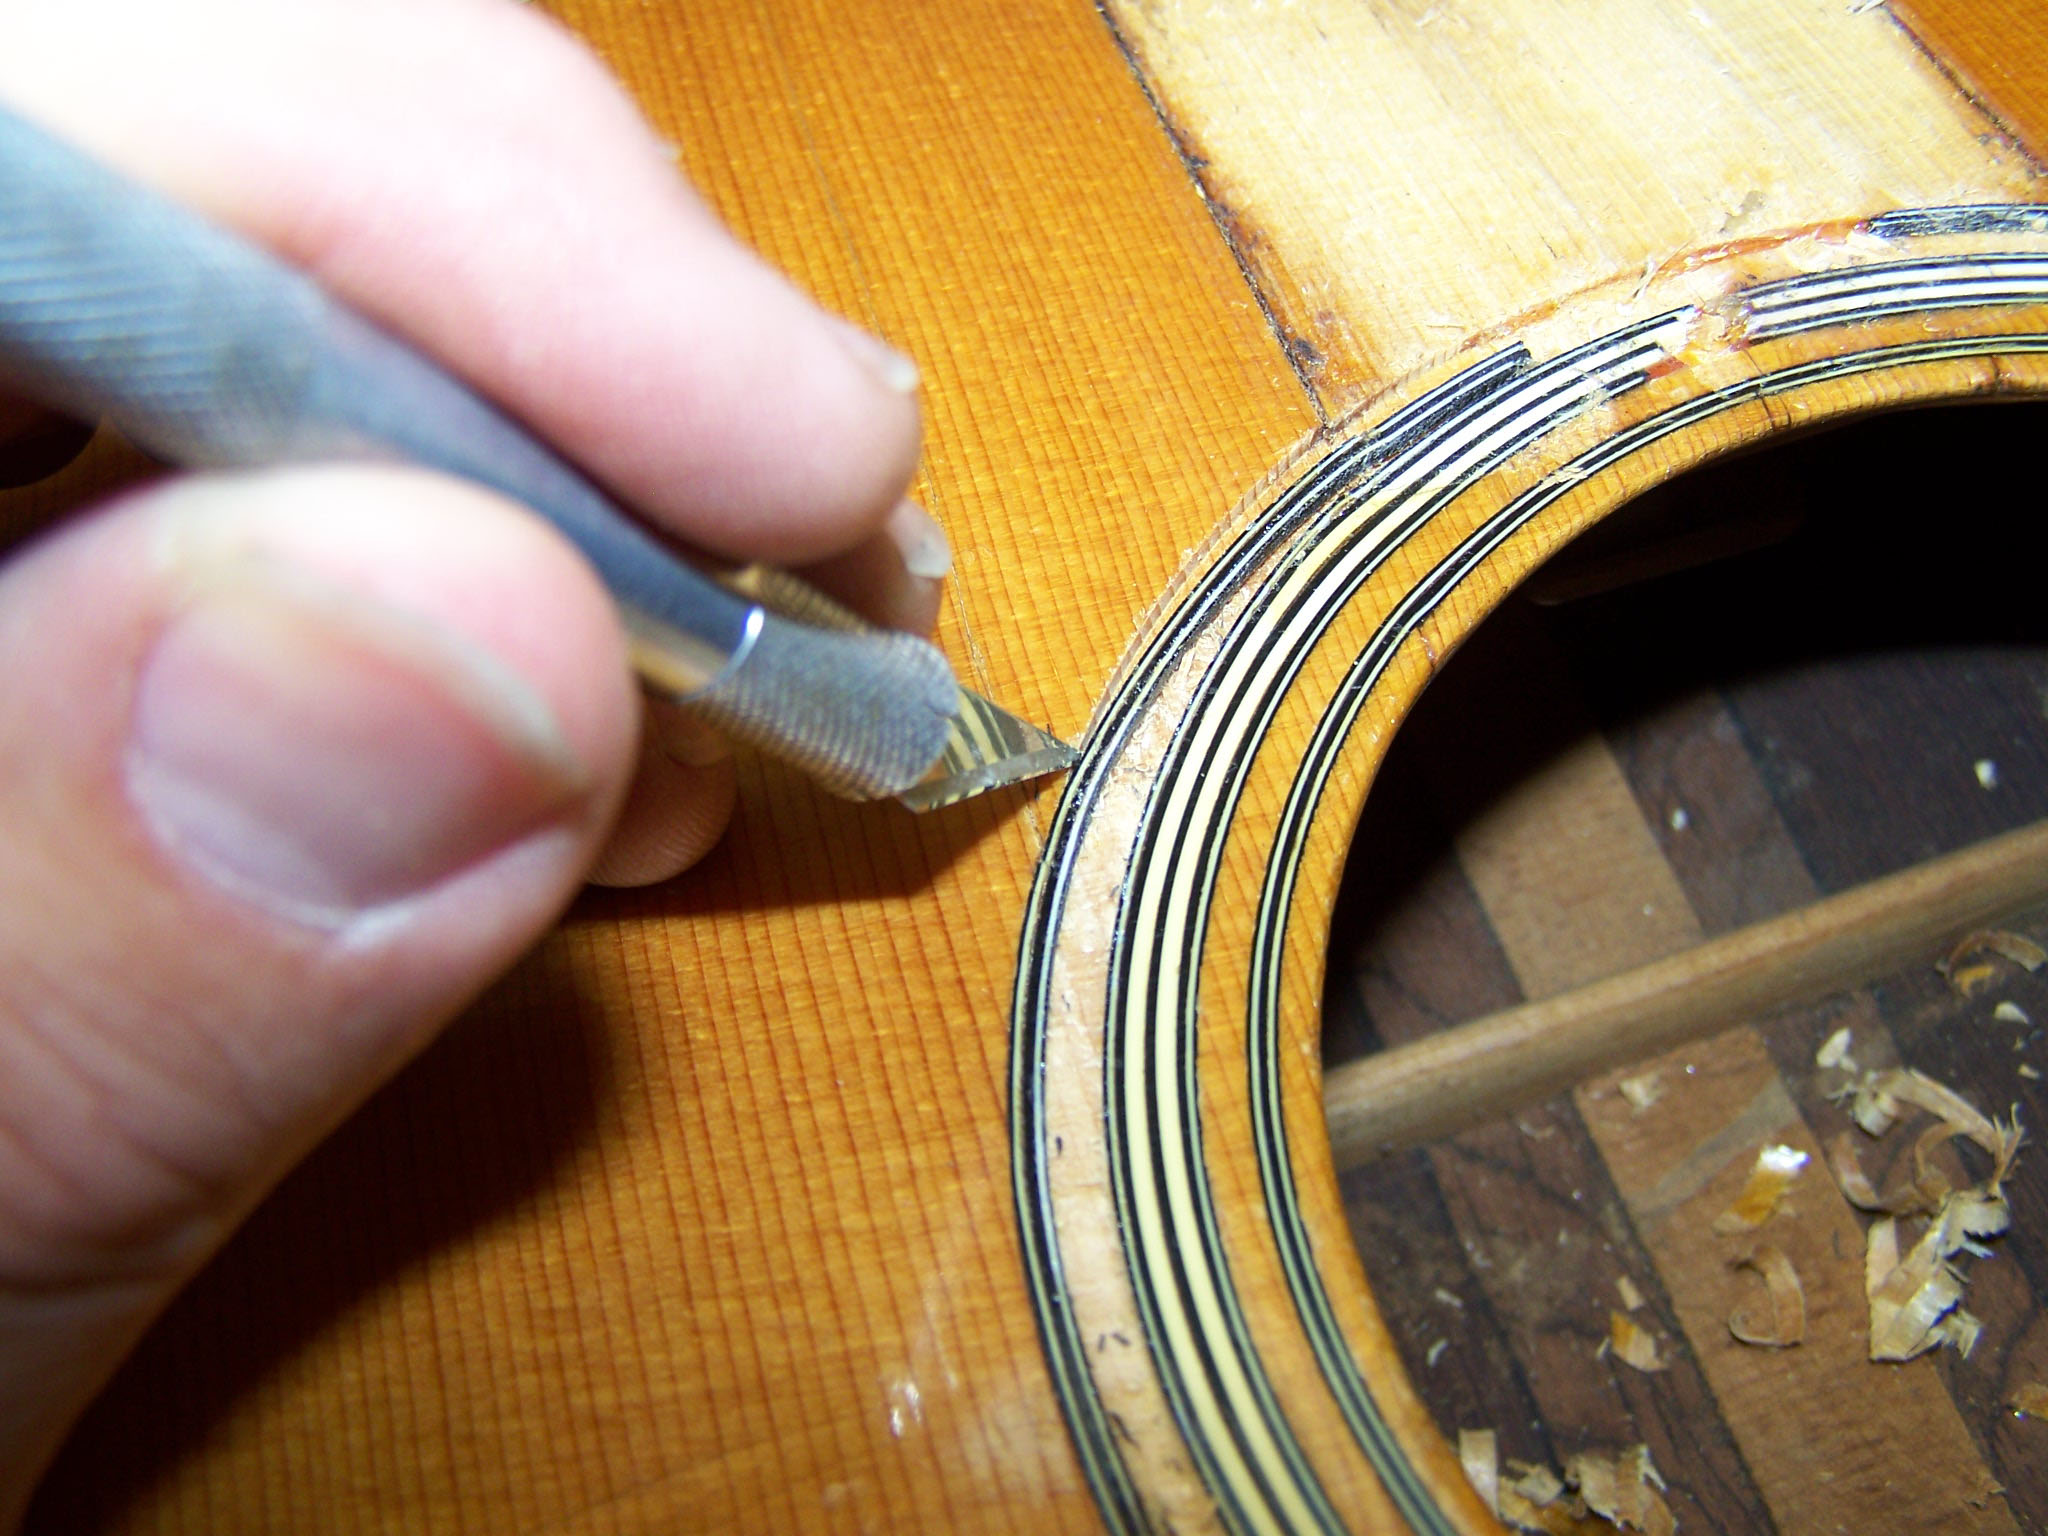 The next step is to remove the outer ring of the rosette, which is still glued to the channel on the bottom and at the outer edge. I've used an exacto blade at the outer edge of the channel to coax the purfling away from the spruce at the outer edge of the rosette ring. For most of the way around this was enough to
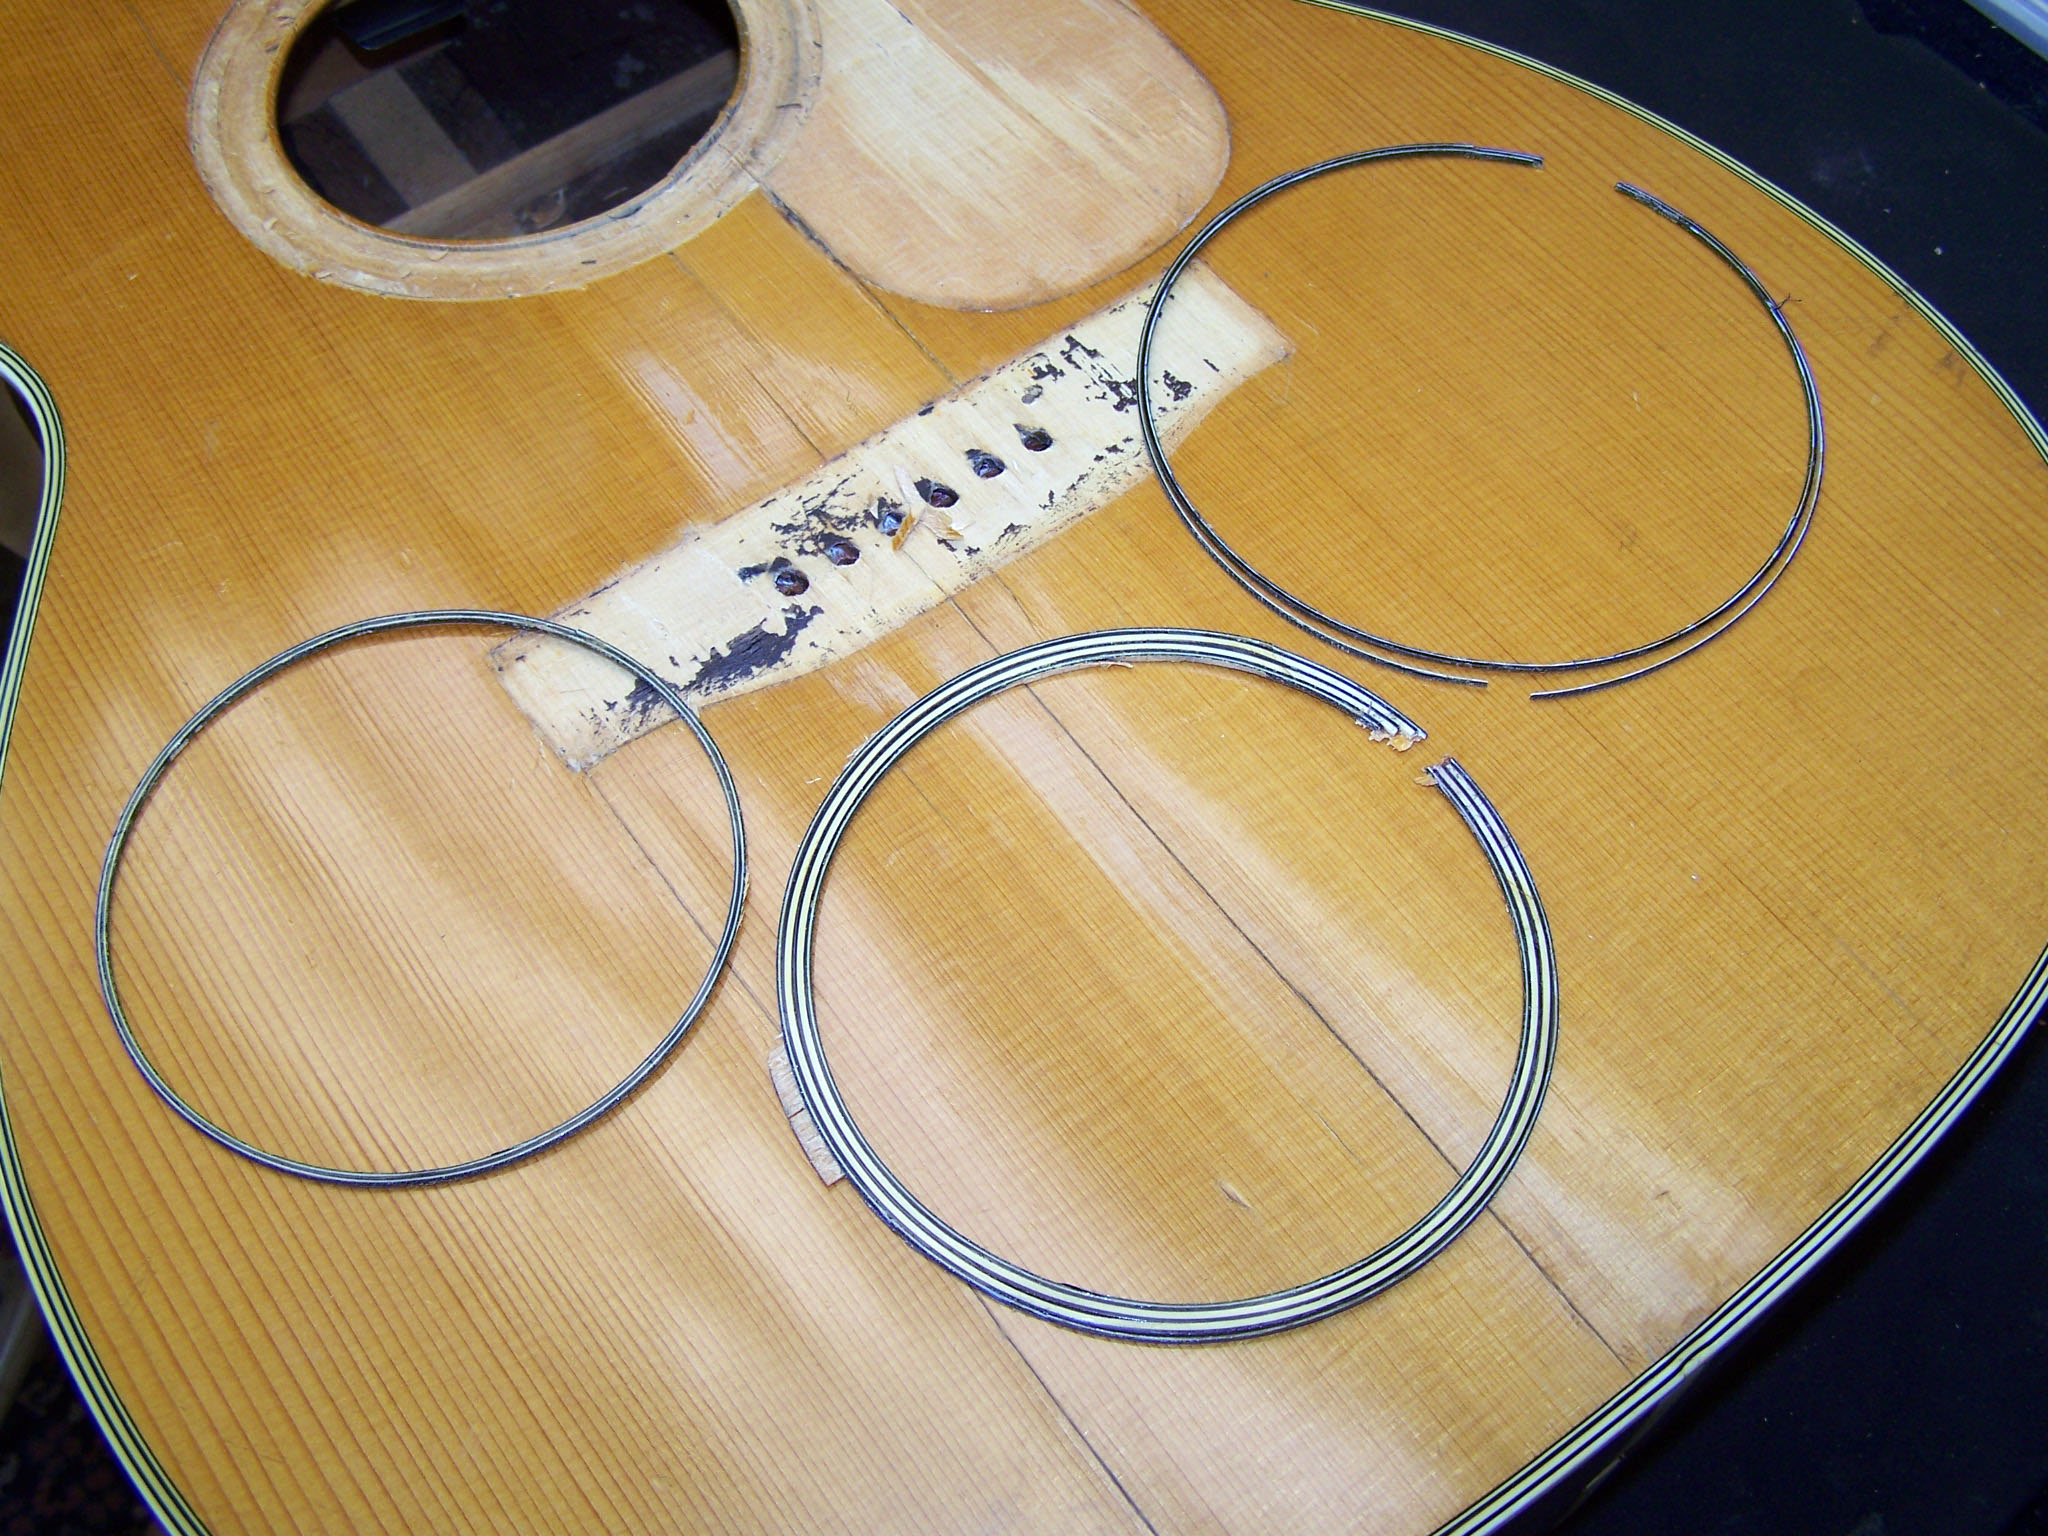 break the line loose from the spruce without damaging the purfling. Where the purfling stuck stubbornly to the bottom of the channel I used a small spatula to lift the purfling from the under side to separate the glue bond and it generally let go with minimal resistance.
  This same process is repeated on the center ring, gently working with the exacto blade against the inner edge and the spatula underneath as needed until the center ring is fully removed. Then all that is left is the spruce border between the center rosette ring and the inner most ring, which can then be removed with a chisel just like in described in the first step. Once that is done the inner rosette ring is removed with the blade and spatula, completing the removal of the rosette rings.
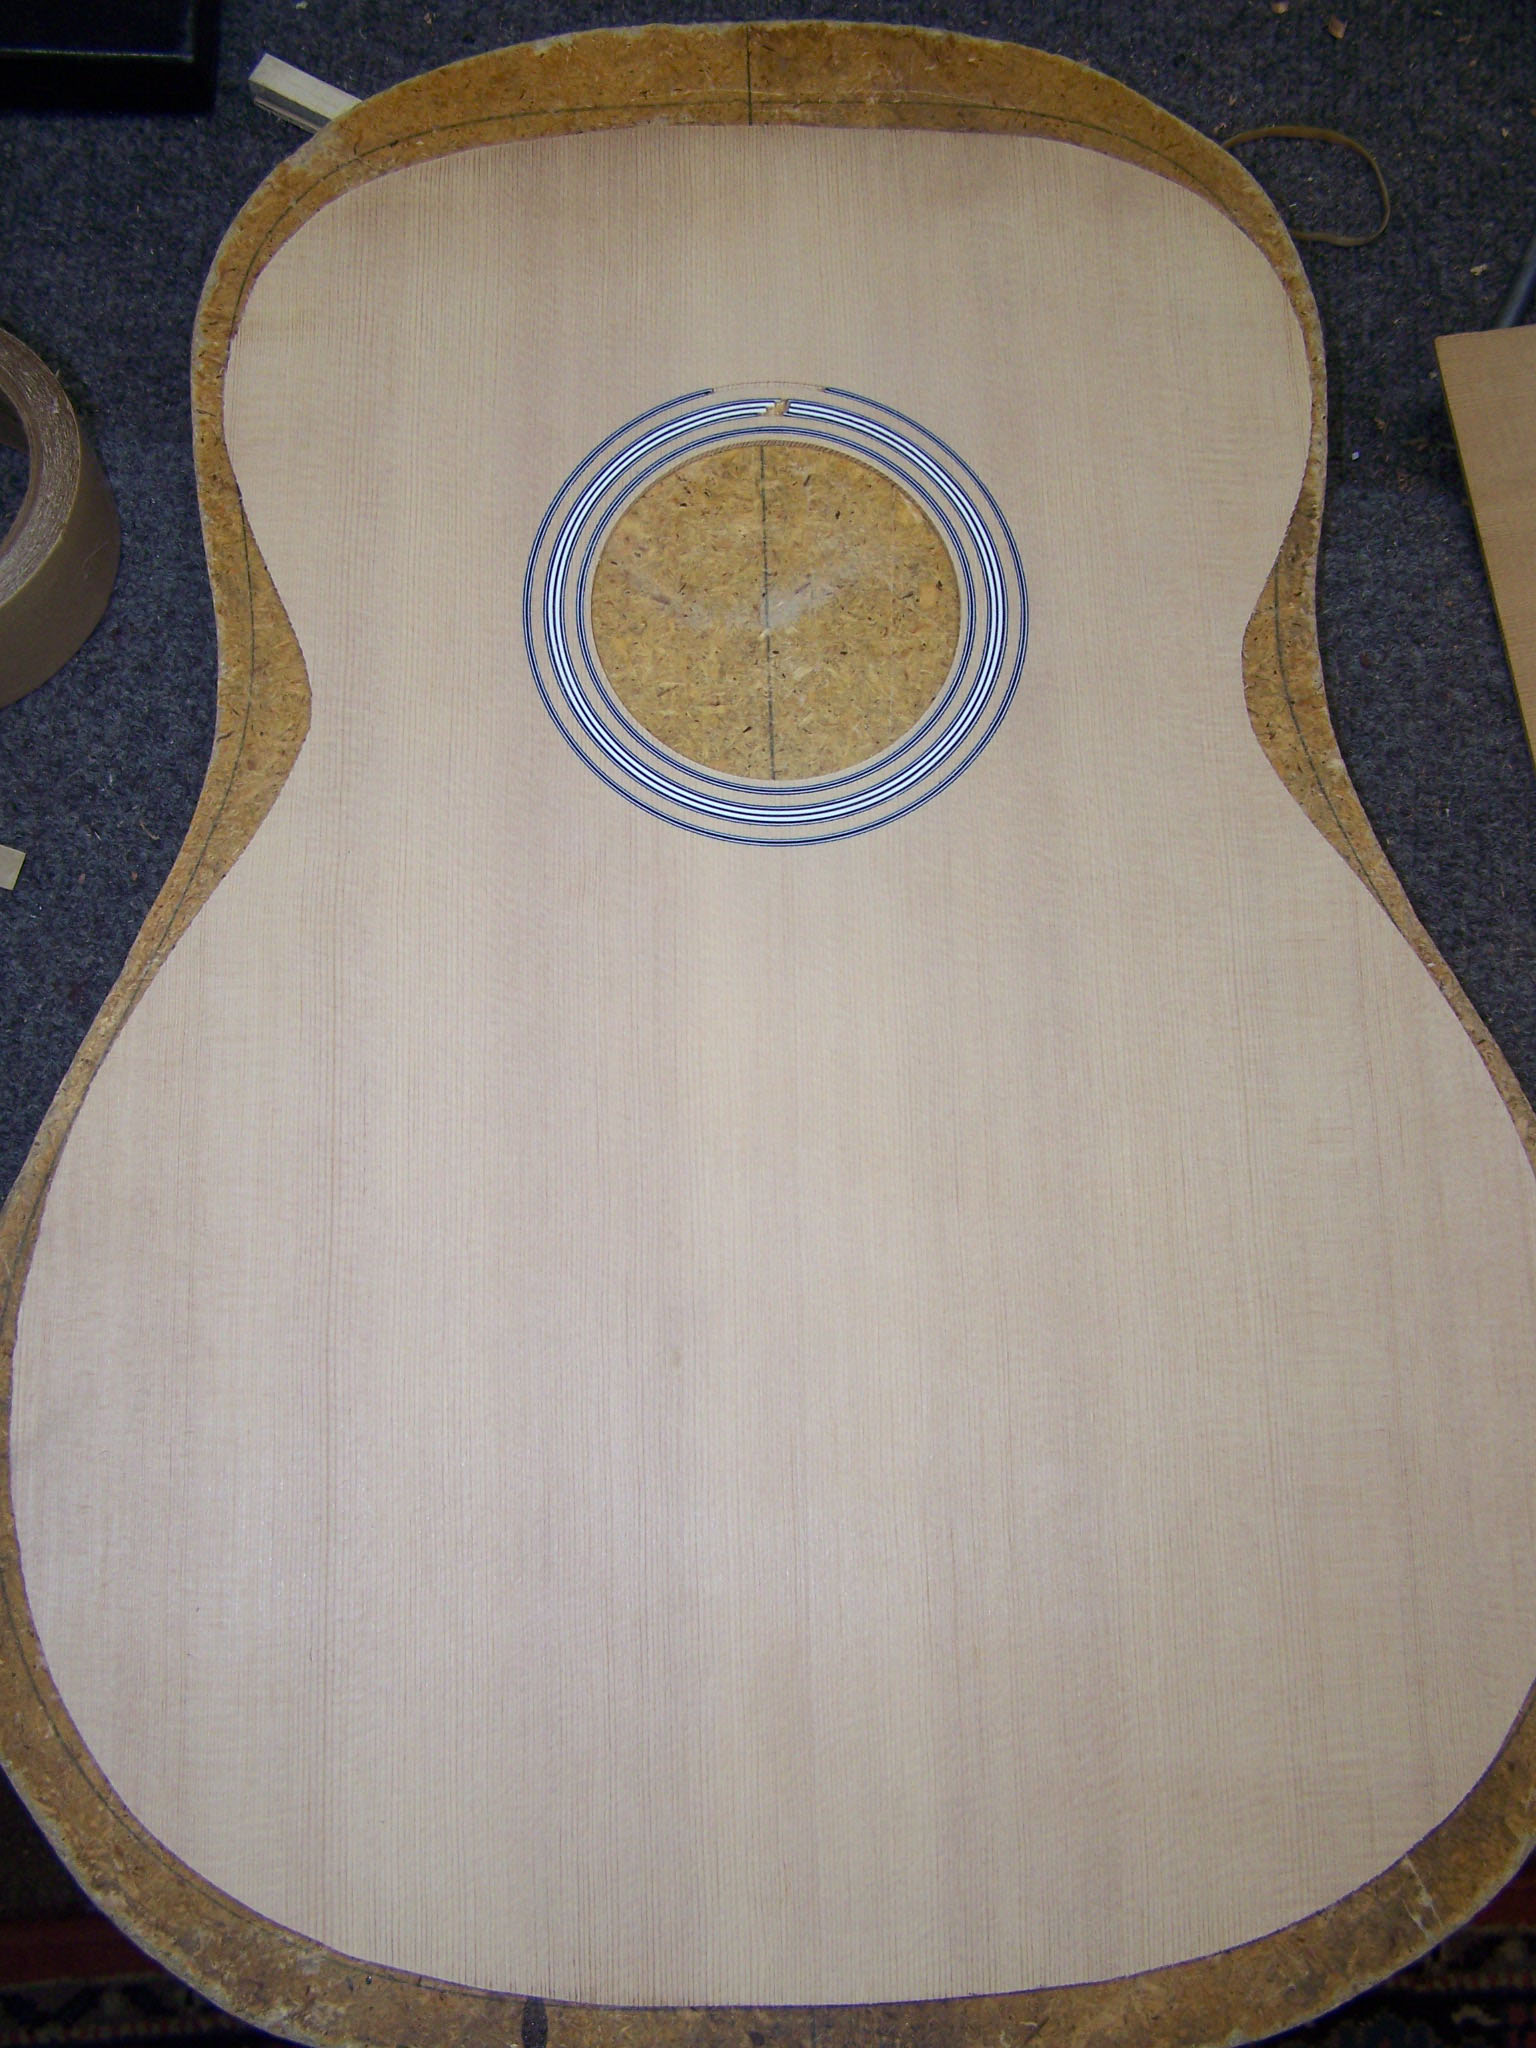
 Finally, the original rosette is inlaid in the new top as you would any rosette.
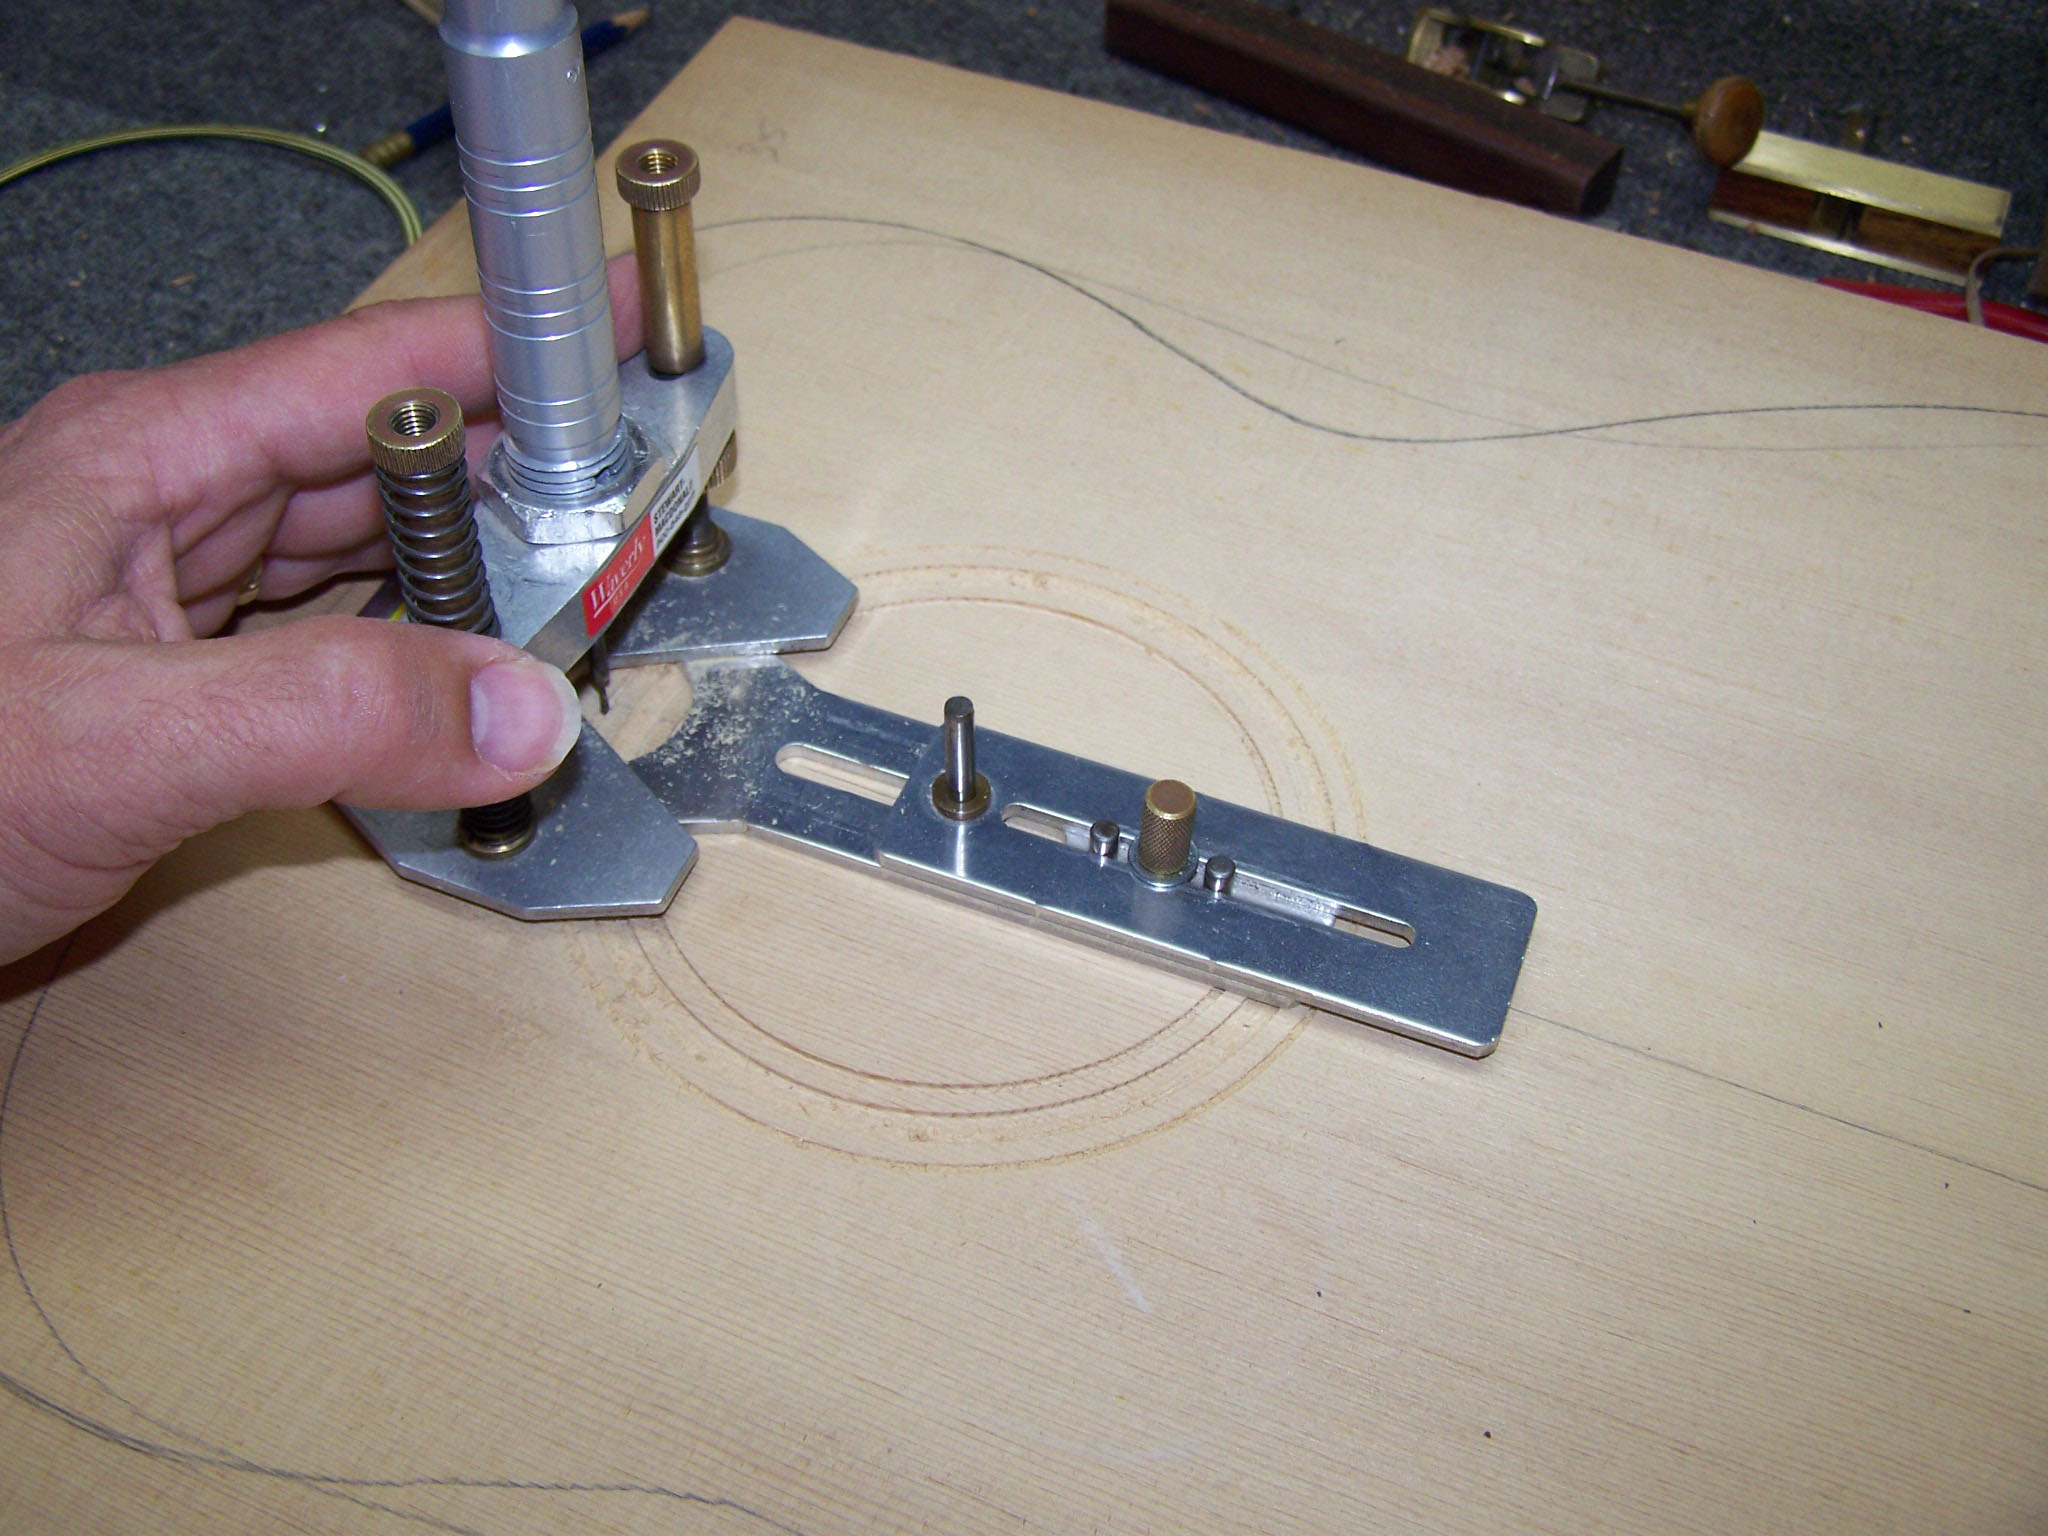
I cut the rosette using the Fordam unit, circle cutter base and spiral cut bits. Removal of the old rosette left a fair amount of old spruce and some glue 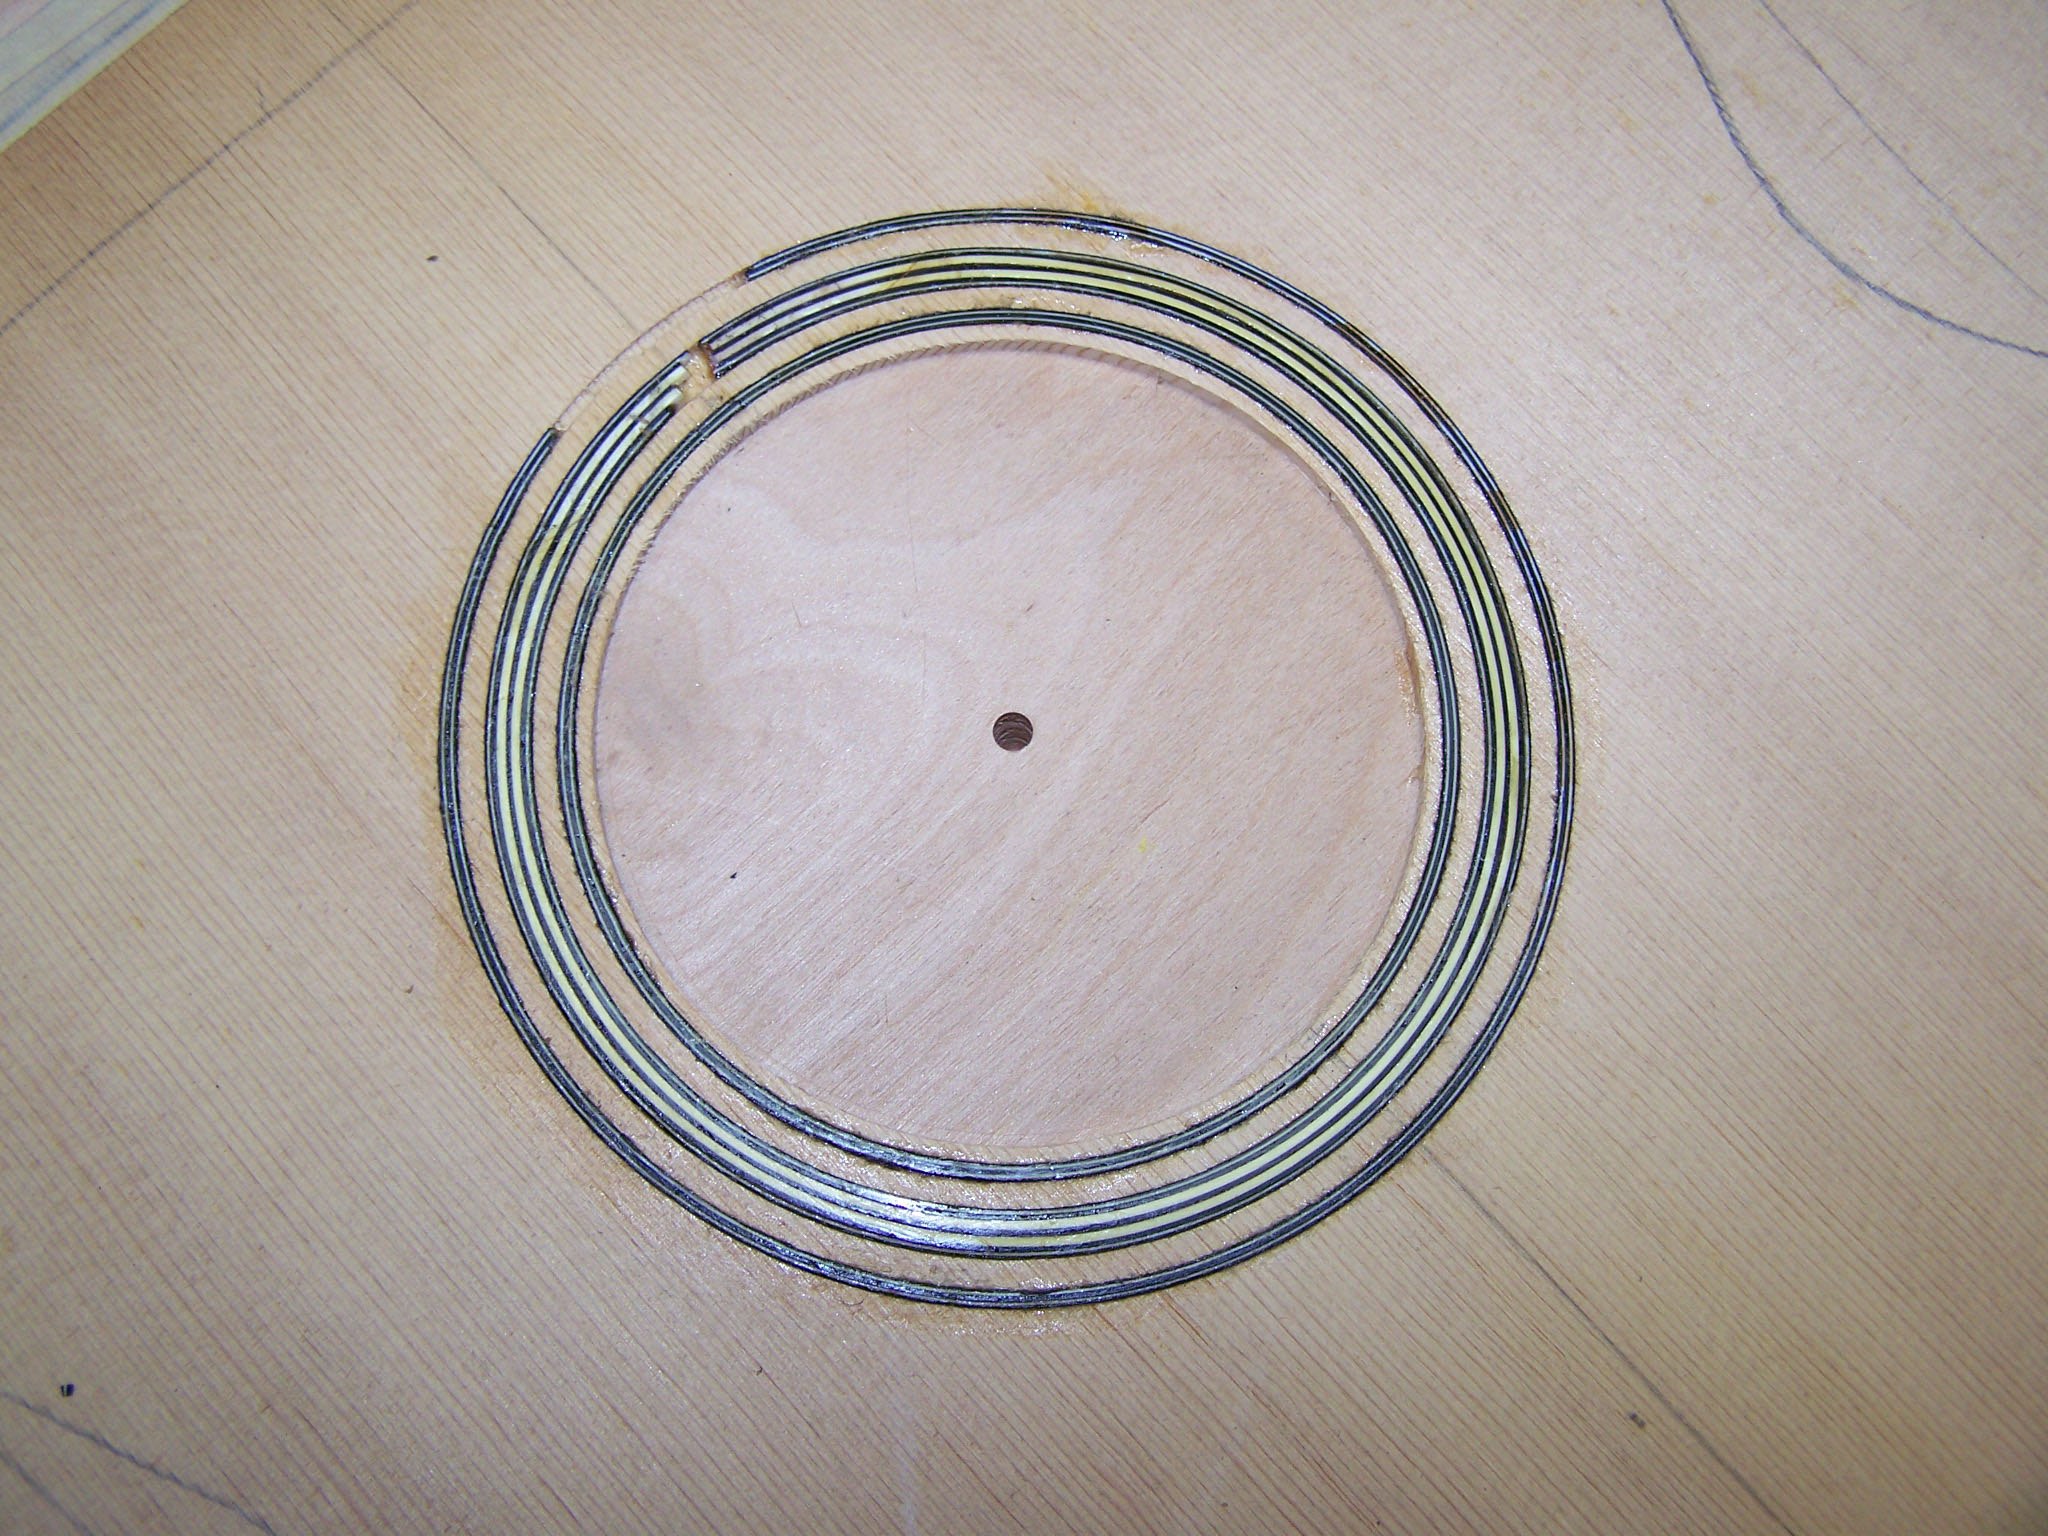 residue on the purfling strips so they were carefully scraped free of debris (with an Exacto blade) to make sure they would fit the channels cut into the new top. I also left the rings slightly proud of the surface of the top so that the lines could be scraped/sanded flush and uniform after installation. After sanding the lines show a nice snug fit and have the look that would have been difficult to reproduce using modern materials.